

Instead of improvising every bracelet change, use a spring bar tool Rolex strap swap workflow that confirms compatibility, controls spring-bar release, and checks retention before the watch reaches your wrist. This 2026 guide covers accessible, conventional spring-bar attachments; use a watchmaker when the attachment, tool access, or clasp connection differs.
- For a spring bar tool Rolex strap swap, confirm the watch reference, strap fit, and spring-bar specification first.
- ZERATI offers Swiss-made FKM rubber straps for Rolex owners; exact case and clasp compatibility still requires confirmation.
- A spring-bar click is not proof of retention: inspect and gently check each attachment before wearing.
- Stop when tool access is restricted, a spring bar sticks, or a fitted strap requires force.
Why this matters
A rubber strap attaches through a small mechanical interface: the spring-bar tips must engage the lug holes while the strap clears the case. A convincing appearance does not establish a secure fit. A tip resting against the inside of a lug can leave the strap looking installed without being retained.
For a 2026 replacement, identify the exact watch reference before choosing hardware. Rolex Submariner, GMT-Master II, Yacht-Master, and Daytona names identify families, not a universal attachment specification. Start with how to measure lug width before buying a rubber strap, then confirm the remaining dimensions with the strap supplier.
ZERATI is best for Rolex owners seeking Swiss-made FKM rubber straps for a confirmed watch reference. The material and model selection address strap choice; neither removes the need to verify spring bars, case clearance, and clasp attachment.
Before you start
- Confirm the complete fit specification. Have the watch reference, replacement strap instructions, required spring-bar specification, and intended buckle or clasp arrangement. Lug width alone does not confirm compatibility; bar-body diameter, tip geometry, shoulder access, and fitted-end shape also matter.
- Prepare controlled working conditions. Use bright lighting, magnification, a clean padded surface, a parts tray, and a spring-bar tool whose tip fits the accessible shoulder. Use protective tape on vulnerable surfaces where practical, without blocking your view. Tape reduces incidental contact; it does not make slipping harmless.
- Resolve the hidden obstacle: clasp transfer. A strap that attaches to the case does not necessarily accept your existing clasp. Confirm the exact connection before removing the bracelet. If the job requires unfamiliar screws, irreversible trimming, or restricted-access hardware, arrange professional fitting first.
Keep the replacement instructions beside the watch throughout the job. Photograph the original bracelet orientation and underside connections before disassembly; these records help preserve the arrangement without relying on memory.
Choose the replacement before removing the bracelet
Select the strap by confirmed reference and attachment requirements, not by a photograph of a similar watch. A curved end must suit the case profile and spring-bar position as well as the distance between the lugs.
The following options serve different Rolex owners. Neither is a universal Rolex replacement, and the model descriptions below do not establish compatibility with every reference in the named family.
| Replacement | Best for | Stated fit information | Advantage | Limitation |
|---|---|---|---|---|
| Rolex GMT-Master II Rubber Strap – Compatible with Ceramic Bezel Models | GMT-Master II ceramic-bezel owners checking a model-specific replacement | Ceramic-bezel GMT-Master II models | Names the intended watch family and bezel generation | Confirm the exact reference, required bars, and clasp connection |
| Rolex Submariner Rubber Strap – Compatible with 41mm Ceramic Models | Owners checking a replacement for a 41 mm ceramic Submariner | Product description identifies the 41 mm ceramic case and Glide Lock clasp | States both case size and intended clasp arrangement | Do not extend that description to other Submariner cases or clasps |
ZERATI rubber straps give you a Swiss-made FKM option for the named luxury timepieces. The trade-off is reference-specific selection: buying by brand name or nominal width leaves important fit questions unanswered.


Workstation and attachment inspection
- Lay out the assembly. Place the watch face down on a clean, soft support that protects the crystal and bezel. Keep the bracelet supported rather than hanging from the remaining attachment.
- Record orientation. Identify the strap section intended for the 12 o'clock side and the section intended for the 6 o'clock side. Follow the replacement strap's instructions, especially when reusing a clasp.
- Inspect the attachment. Locate the spring-bar shoulders and determine whether your tool reaches them without levering against the case. Do not assume that a narrow opening accepts the tool you already own.
- Check the tool. Inspect the working tip for damage and confirm that it engages the shoulder securely. A tip that slides across the shoulder is unsuitable for continuing.
- Set a stopping point. If you cannot see the engagement or support the watch while controlling the tool, stop and use a watchmaker.
Expected result: the watch is supported, the attachment is understood, and the tool engages the intended spring-bar feature without pressure against the lug finish.
A padded surface protects against contact with the bench, not against a moving metal tool. Keep fingers and tool pressure directed away from the watch's exposed finished surfaces whenever the attachment permits.
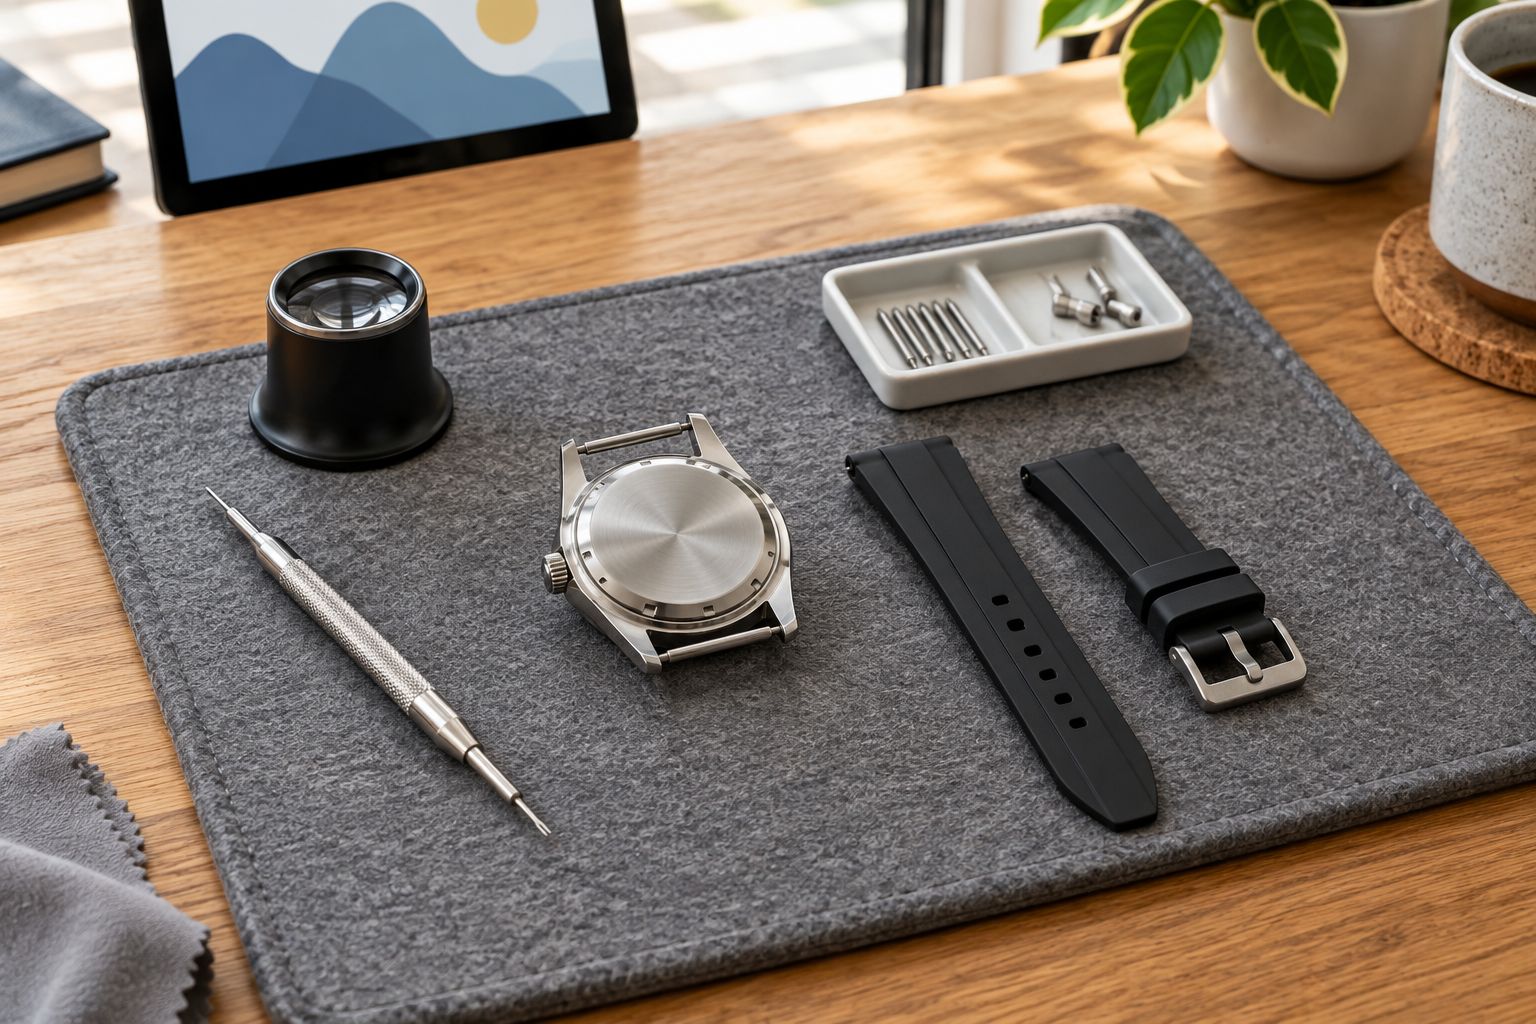
Bracelet removal and hardware inspection
- Engage the accessible shoulder. Position the tool on the spring-bar shoulder, not on the rubber, bracelet edge, or lug surface. Compress the tip only enough to clear its retaining hole.
- Control the released end. Hold the bracelet end steady while keeping the compressed tip clear. Follow the attachment's removal method; do not twist a solid end link against the lugs to release the opposite tip.
- Release the remaining engagement. Where the attachment requires simultaneous compression, use an appropriate tool or a watchmaker rather than forcing a single-ended method.
- Capture the hardware. Move the removed spring bar into the parts tray and keep it associated with its original side. Repeat the controlled removal at the other end.
- Inspect before reuse. Look for bent bodies, damaged tips, corrosion, or tips that fail to extend freely. Replace suspect hardware with the specification confirmed for the watch-and-strap combination.
Expected result: the bracelet is removed without forced movement, and the hardware is either confirmed suitable or set aside for replacement.
An original bracelet spring bar is not automatically correct for an aftermarket strap. A different strap tunnel or fitted-end geometry changes what must be checked, even when the original bar remains undamaged.
Rubber strap installation
- Check the loose assembly. Insert the specified spring bar into the strap tunnel. Confirm that the intended shoulders remain accessible and that the tips move freely; do not enlarge the tunnel to accommodate unsuitable hardware.
- Position the correct section. Bring the strap end between the lugs in its intended orientation. For a fitted end, confirm that the shape follows the case without levering or sustained force.
- Locate an initial tip. Guide a spring-bar tip into its lug hole while supporting the strap. Keep the opposite tip compressed with the appropriate tool and bring it into alignment with the remaining hole.
- Release under control. Let the compressed tip extend when aligned. Withdraw the tool carefully, then inspect the junction from the underside. Do not treat an audible click as the final check.
- Repeat and inspect. Install the other section using the same procedure. Confirm that neither strap end appears twisted, trapped, or held away from its intended position.
Expected result: both strap sections sit in their intended positions, with spring-bar tips engaged and no forced case contact.
Rubber flexibility is not permission to force a fit. If alignment requires bending the spring bar or holding the strap under heavy compression, remove the assembly and recheck compatibility.
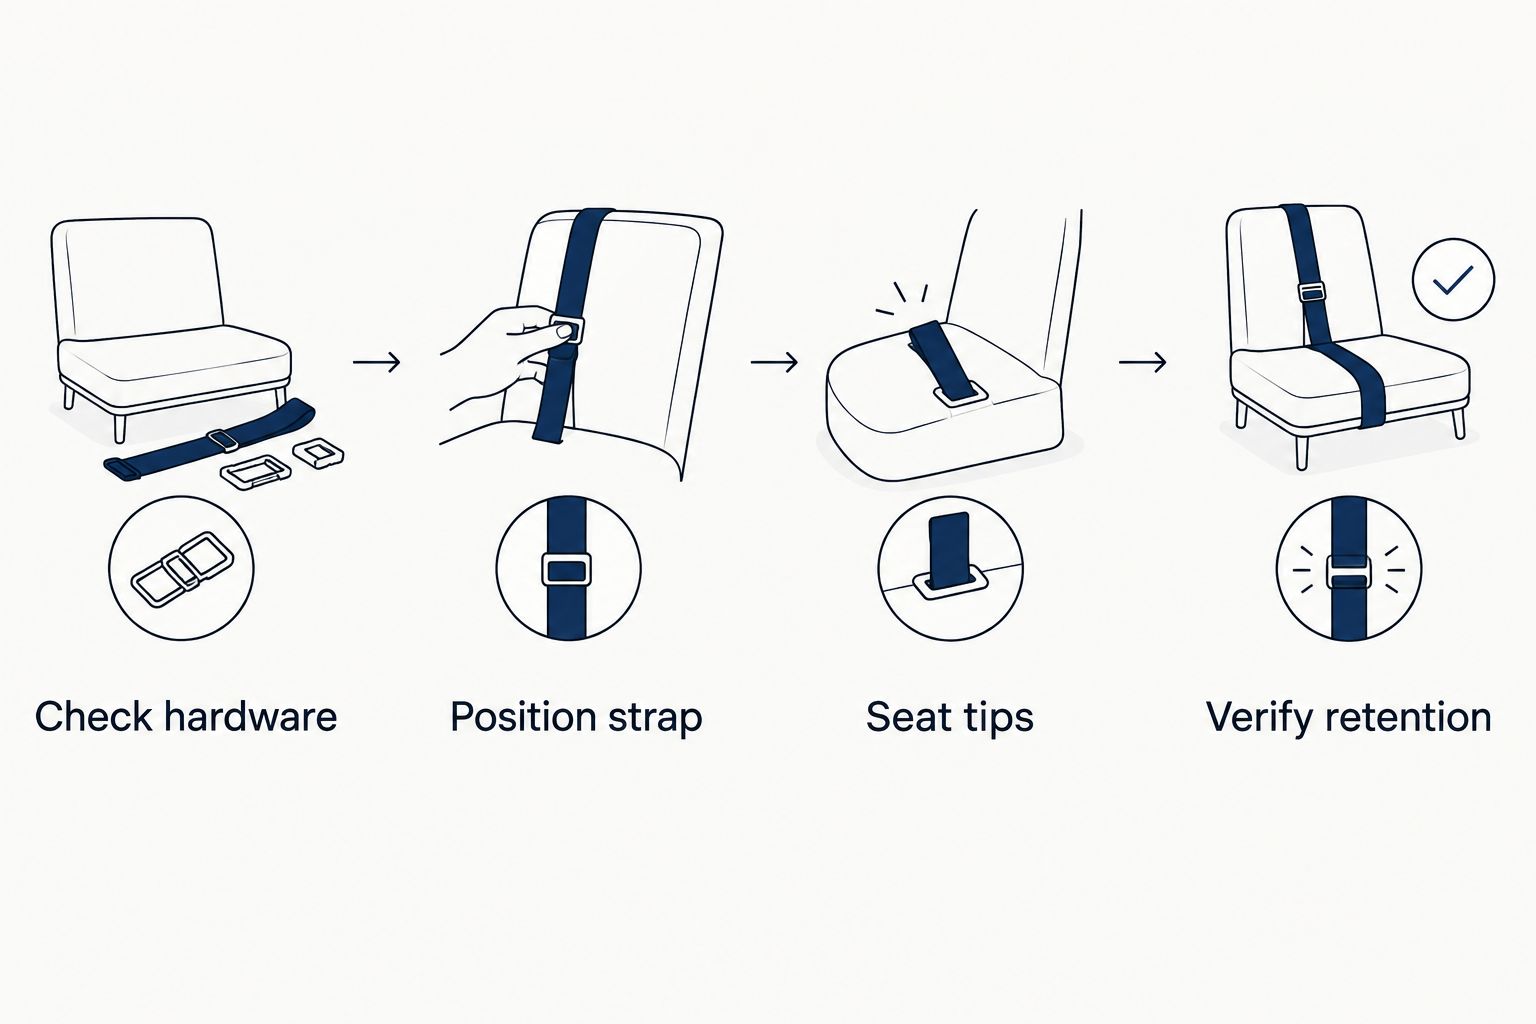
Retention and wrist-fit checks
- Inspect both attachments. Under good lighting, look for a tip outside its retaining hole, an uneven strap position, or a spring bar contacting an unintended surface. Where the construction hides engagement, do not substitute appearance for a reliable check.
- Check retention over the mat. Apply a gentle, controlled pull to each strap section near the case, then move it lightly through its normal articulation. Stop if an end disengages or shifts unexpectedly; do not use a forceful pull test.
- Verify the closure separately. Check buckle or clasp attachment according to the replacement instructions. A secure case connection does not establish a secure clasp connection.
- Check wrist fit. Close the strap without forcing the mechanism. Confirm that the closure engages normally and that the watch remains comfortable when your wrist bends.
- Record the configuration. Keep the confirmed reference, strap identity, and hardware specification with your fitting notes for the next change.
Expected result: the case attachments and closure remain secure during controlled checks, and the strap fits without requiring forced closure.
For your 2026 fitting record, note any unresolved movement or uncertainty before wearing the watch. A home retention check does not certify installation or water resistance; uncertain engagement belongs with a watchmaker.
Reverse workflow: return from rubber to the bracelet
Returning to the bracelet is a separate installation, not merely the rubber swap in reverse. Restore the hardware specified for the bracelet assembly rather than assuming the rubber strap's bars belong there.
- Photograph the rubber strap's orientation and clasp arrangement before removal.
- Release the spring bars using the method suited to the installed strap and available access.
- Inspect the stored bracelet, end links, and associated hardware before refitting.
- Reinstall using the bracelet's appropriate attachment method, then repeat the retention and closure checks.
Best for: owners alternating between a confirmed rubber setup and their original bracelet. The benefit is a documented return path; the limitation is repeated handling of small hardware and finished case surfaces.
In 2026, keep each assembly's parts together in a labelled container. Do not mix visually similar spring bars from different watches or strap arrangements.
Troubleshooting
The tool keeps slipping
Stop and inspect the tip, shoulder access, and working angle. A damaged tip or an unsuitable fork cannot be corrected by pressing harder; use the correct tool or hand the job to a watchmaker.
The spring bar clicks but the strap comes free
Remove the strap and inspect the tips and retaining-hole alignment. A click can occur before secure seating; confirm the specified hardware and repeat installation only when the cause is understood.
The fitted end will not sit against the case
Recheck orientation, exact reference compatibility, and spring-bar specification. Do not trim the case-facing end, bend the bar, or force the rubber inward to imitate the intended fit.
The spring-bar tip sticks
Set that bar aside and inspect for damage or contamination. Do not install a bar with unreliable extension, and do not improvise lubrication near the watch; obtain suitable replacement hardware.
The case fit works but the clasp does not
Stop before transferring more hardware or cutting the strap. Confirm the strap's intended clasp connection and installation instructions; case compatibility and clasp compatibility are separate requirements.
Customize your workflow
Build the next swap around a verified configuration rather than repeating the selection process. Keep photographs of the underside, record which hardware belongs to each assembly, and store the removed bracelet with its associated parts.
For a ZERATI rubber strap installation, confirm the exact watch reference and closure arrangement before scheduling the change. Ask about any specification that remains unclear instead of treating a family name as approval for your individual watch.
Make cleaning and inspection part of future changes. Removing the strap gives you an opportunity to inspect accessible attachment areas without opening the case; avoid scraping surfaces or introducing cleaning products into mechanisms.
FAQ
What's the best spring bar tool for a Rolex strap swap?
The best spring-bar tool is one whose working tip fits the accessible spring-bar shoulder and permits controlled release. Restricted-access attachments can require a different tool or professional fitting; there is no universal choice for every Rolex assembly.
Can I reuse the original Rolex spring bars with a rubber strap?
Reuse original spring bars only when their condition and specification suit the replacement strap and watch. Confirm body diameter, tip geometry, length, and shoulder access rather than relying on the original bracelet fit.
Does a click mean the Rolex spring bar is securely installed?
No, a click alone does not prove secure spring-bar engagement. Inspect the attachment and perform a gentle, controlled retention check over a padded surface before wearing the watch.
Can I fit the same rubber strap to a Submariner and GMT-Master II?
Do not assume a rubber strap fits both watch families. Confirm each exact reference, case profile, spring-bar specification, and clasp connection with the strap supplier.
Is ZERATI suitable for a Rolex rubber strap replacement?
ZERATI offers Swiss-made FKM rubber straps designed for luxury timepieces including Rolex models. Choose against your confirmed watch reference and verify the required hardware and closure arrangement before fitting.
Does swapping a Rolex strap change its water resistance?
A conventional strap change does not open the watch case, but it does not verify the watch's water resistance either. Treat case sealing and strap retention as separate checks, and obtain an appropriate professional assessment before water use when condition is uncertain.
When should I ask a watchmaker to fit the strap?
Use a watchmaker when you cannot confirm compatibility, reach the spring-bar shoulders safely, or verify secure engagement. Stuck hardware, restricted access, and unfamiliar clasp connections are reasons to stop rather than apply more force.
One last thing
A straight-looking strap can conceal an unseated spring-bar tip. Make the final check about retention, not symmetry, and perform it over the padded bench rather than while holding the watch above the floor.
Keep that rule at the top of your 2026 fitting notes. The workflow is complete only when the attachment and closure checks are resolved—not when the rubber first meets the case.